----
How-To: Now's the right time to swap your old iMac's hard drive for a fast new SSD
// 9to5Mac

If you bought your iMac 3-5 years ago, there's probably nothing so seriously wrong with the hardware that you need to consider replacing the machine. Sure, the new iMac with 5K Retina Display looks a little nicer, but at a steep $2,499 starting point, it's still a luxury, not a necessity.
Yet there's something you can do for $200 to $500 that will radically change your iMac's performance: install a solid state drive (SSD) in addition to or instead of its original hard drive. SSDs use high-speed memory chips rather than the spinning platter mechanisms in traditional hard drives, achieving up to 5X benefits in speed while requiring no moving parts. Five years ago, SSDs were both expensive and limited in capacity, making them unlikely components for most Macs. Today, high-quality, capacious SSDs can be had for reasonable prices, and they're surprisingly easy to install in iMacs. With limited expertise and only three tools, I swapped out my old hard drive for an SSD in roughly 30 minutes. Here's how I did it, and – if you're up for a quick do-it-yourself project – what I'd recommend for you.

First Choice: Are You Replacing or Keeping Your Old Hard Drive?
iMacs sold between 2009 and mid-2012 have two drive bays: one for the hard drive, and one for the DVD/CD SuperDrive. Some people prefer to keep their old hard drives and replace the optical drive with an SSD. Other people want to keep the optical drive and swap the hard drive for an SSD. It's easier to replace the optical drive, but if you still use DVDs or CDs on occasion, swapping the hard drive is an option. (That's what I did.)
If you're going to keep your old hard drive inside your iMac, you could save money on the SSD by going with a lower capacity model: 128GB or 256GB could be enough to hold OS X and all of your apps, keeping your music, photos, and videos on the old drive. But if you're going to swap the hard drive for an SSD, you'll probably want a 512GB or 1TB drive, which will have enough breathing room for files that you won't feel constrained over the next few years. I paid a little bit more and went with a 1TB drive, a decision I don't regret at all.
What You'll Need

A solid state drive. After a lot of research, I strongly preferred the price, performance, and durability offered by Samsung's 850 EVO, which comes in 1TB ($400, reg. $500), 500GB ($200, reg. $270), 250GB ($100, reg. $150) and 120GB ($75, reg. $100) versions. With write and read speeds in the 500MB/second range, the 850 EVO is super fast, has a five-year warranty, and promises 30% better long-term performance than its already excellent predecessor 840 EVO. There are cheaper SSDs out there, but I value speed and reliability; the 850 EVO has both in spades.

Tools. You'll need two grippable suction cups (or one large suction cup, gently applied) T-8 and T-10 Torx screwdrivers, a small Philips head screwdriver, a microfiber cleaning cloth, and some LED screen-safe cleaning spray. You'll probably have at least some of these tools already. This $8 (reg. $13) Delcast Torx set will give you the special Torx drivers you need for this and future projects; a $4 suction cup like this one from WorkShop will be enough for this product. A metal paperclip or tweezers are also handy for pulling the LED display up from the iMac's chassis.

An in-line digital thermal sensor. If you're going to remove the iMac's hard drive, this roughly $40 cable from OWC/Newer Technology will save you major headaches going forward. Apple hard drives have temperature probes inside; third-party SSDs do not. This cable adds a probe to your SSD, preventing the iMac from panicking and turning on its fans at full blast whenever you turn the computer on. There are software alternatives to this cable, but consider this a small investment that will reduce your need to screw around with manual fan controls while keeping your Mac running perfectly.

A 2.5″ to 3.5″ drive converter bracket. Again, if you're going to remove the iMac's hard drive, you'll need a $10-$15 metal plate to mount the 2.5″ SSD in the iMac's 3.5″ drive bay. Newer Technology sells this $15 one called AdaptaDrive; a less expensive $8 version from StarTech will suffice. Screws are included to mount the SSD on the plate; you'll reuse the iMac's screws to mount the plate inside your computer.
How Do You Do It Yourself?

In all candor, I had no idea how easy or difficult the SSD swap process would be. But if you have the parts mentioned above, it's astonishingly simple.
Preserving Your Software
Preparing your iMac's existing hard drive to be replaced is almost as painless as if you're leaving it untouched inside. You can run a complete Time Machine backup to an external drive (preferably one that's connected with a cable rather than over Wi-Fi), or complicate the process somewhat by using a complete drive cloning app.

In my opinion, going the Time Machine route is a better idea when starting fresh with an SSD, and it costs nothing. You just turn off and unplug your iMac, swap the drives, then hold Command-R down on the keyboard when first restarting your Mac. Any recent version of OS X will boot into Internet Recovery mode, enabling you to use Disk Utility to format the SSD (choose Mac Extended + Journaled), then restore directly from your Time Machine backup. The restoring process will take hours, but you'll come back to a fresh Yosemite install with everything pretty much as it was left on your old drive.

If you want to go the more complex route, you can order this $13 (reg. $16) USB 3.0 to 2.5″ SATA III Adapter Cable, connect it to your iMac and SSD before opening up the machine, and run SuperDuper or Carbon Copy Cloner to transfer the old drive's contents to the new drive. This will let you start using your iMac right away after the drive is swapped, without waiting hours for Time Machine, and for better or worse pretty much guarantees that every one of your files (and potentially plenty of cruft) will be exactly where it was before.
For users with plans to swap an optical drive for an SSD, nothing needs to be done to prep software beforehand. Backing up your Mac is always a good idea before opening it up, but all you'll need to do after the SSD installation is run Disk Utility and format the new drive.
Hardware
While I'll leave the specific iMac opening instructions to the experts at iFixit (this guide works for pre-2012 27″ iMacs), and the details of installing the digital thermal sensor to this video at OWC/Newer Tech, here's a brief play-by-play of my SSD installation experience.

(1) Removing the iMac's glass front was much easier than I expected. If you go gentle when pulling up on a single large suction cup in the upper left or right corner, you can remove the glass face in a matter of seconds, pulling tabs upwards from the iMac's metal chin. Cleaning and reinstalling the glass was so simple that I wish I'd tried it earlier, when dust first began to accumulate between the glass and screen.

(2) Pulling up the iMac's display looks a lot more complicated than it is. Eight Torx screws need to be removed, which is barely challenging at all. You then need to follow the iFixit directions, using a paperclip (or tweezers) against the screen's metal frame to tilt it upwards, then very gently pull four small monitor connectors out from the iMac's various boards. Go slowly and carefully, though you'll soon realize that (with a little dexterity and that modest bit of experience) you'd be able to do all four again in less than two minutes.

(3) Swapping the hard drive out takes little more effort than removing two cables from its back and unscrewing four more Torx screws. An EMI sticker gets pulled off the hard drive and placed on the SSD. Figure out which orientation the SSD needs to be on relative to the 2.5″ to 3.5″ drive converter bracket, then screw the SSD to the bracket with the bracket's included screws. Attach the bracket to the old hard drive's metal rail, such that the SSD's connector pins will eventually face the iMac's small and large hard drive cables.

(4) Following OWC's video, add the in-line digital thermal sensor to the larger hard drive cable in the iMac, connect the sensor's larger connector to the SSD, then use the adhesive backing to attach the sensor to the SSD's large exposed side. Reattach the smaller hard drive cable to the SSD, then use the other Torx screws to attach the bracketed SSD in the iMac. Tuck the thermal sensor's body off to the edge of the SSD.

(5) Go in reverse, reattaching the four display cables, remounting the screen, putting the 8 Torx screws back, and reattaching the glass. Stop long enough to gently clean the screen and the glass with the microfiber cloth and screen-safe cleaning fluid.
Can I Do This Myself, Or Should I Hire Someone To Help?
Following publication of this article, several commenters suggested that the upgrade is too difficult for regular people to handle on their own. I respectfully disagree, but then, I find 30 minutes of using a suction cup, screwdrivers, and a paperclip a lot easier than more labor-intensive do-it-yourself projects like remodeling a bathroom or changing a car's tire. Reasonable people – as well as their particular skills and concern levels about technology – may differ.
If you're intimidated by the thought of opening your iMac, or think you might have problems gently removing parts or disconnecting the internal cables, seek out a local Mac repair shop to do the hard drive to SSD swap. Be prepared to pay between $50-$100 (plus the cost of the SSD and possibly other parts), and transport your iMac to and from the shop in its original packaging to avoid damaging it in transit. You'll also want to make sure the shop has specific experience in iMac hard drive replacements, and is insured in the event something goes wrong, as these are the only potentially important differences between hiring someone else and doing it yourself.
That's It? Seriously?

If you're swapping the old hard drive for an SSD, yes, that's it. Rebooting your Mac with an empty SSD requires just holding down command-R on the keyboard, after which you'll see the Internet Recovery prompt and perhaps 15 minutes of automated downloading. If you're booting from a pre-cloned SSD, your Mac will come back as it was before. And if the SSD's in the optical drive bay, your iMac will now have two internal drives to choose from. Make the SSD the boot drive by installing Yosemite on it and choosing it in System Preferences > Startup Disk.

You'll begin to notice how much faster your iMac is pretty quickly after the installation process is complete. Until and unless there are some major Mac processor performance jumps (and apps worth upgrading for), simply adding an SSD is going to make a much bigger speed difference for most iMac owners than getting a completely new computer with a faster CPU or video card. The machine will resume from sleep instantly, reboot in seconds, and load apps as if they're tiny. My SSD-equipped iMac is now seeing roughly 500MB/second read and write speeds, a solid 5 times faster than it was with a hard disk.
Prices have fallen enough that average users will finally find that SSDs now deliver a great balance of speed and capacity for the dollar. If you're an iMac user, and you want to experience much-improved performance, it's time to make the switch.
Filed under: How-To, AAPL Company, Mac Tagged: how to, iMac, Solid-state drive, SSD, tutorial
For more information about AAPL Company, Mac, and iMac continue reading at 9to5Mac.
What do you think? Discuss "How-To: Now's the right time to swap your old iMac's hard drive for a fast new SSD" with our community.
----
Shared via my feedly reader

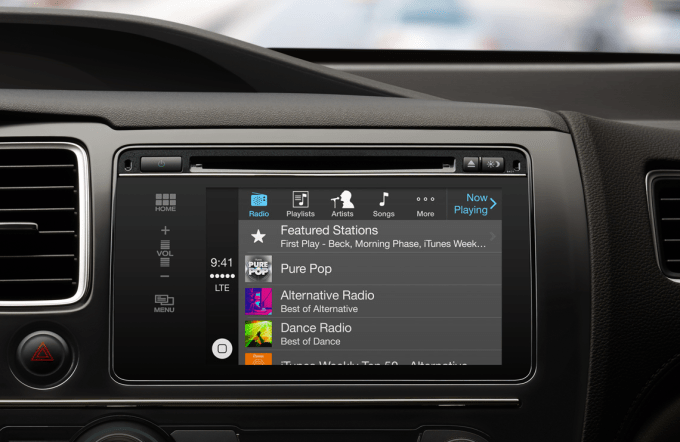 Apple is indeed working on a car, according to the Wall Street Journal. The Mac maker kicked off a top-secret project tasked with developing an electric car with a minivan aesthetic, per the WSJ's sources, after CEO Tim Cook approved the project nearly a year ago. It includes "hundreds" of staffers and is led by Ford Motor vet and Apple VP Steve Zadesky, and it includes…





 隨著與 Cyanogen 團隊的合作出現問題,一加推出自己 Android ROM 的計畫就被更早地提上了公司的議事日程。而在今天,官方首先公佈了系統的正式名稱,和之前一樣,它將分為中國大陸及海外兩個版本,分別被稱作「H2 OS」和「OxygenOS」。據悉該 ROM 會延續本月初 Alpha 版的風格,接近原生且「不含多餘的軟體及功能」,並且「開放和保有很強的客製性」。除此之外,一加暫時還沒有透露其它內容,但我們被告知 2 月 12 日時會有更多驚喜,屆時大家記得留意一下囉。...